Bead
board is a particle board that doesn’t require too much prep work. Although,
with any wood project whether it’s pine or particle board you always want to
sand the sides of you wood. We sell sandpaper and sanding blocks at our store. The
sanding blocks are really good to use but you can get more out sanding of regular
sandpaper. When using sandpaper, I usually cut my sheet into 3 strips. Then
take one strip and fold it into thirds. This way while you’re sanding the paper
won’t slide.
When
staining bead board we use Wood Sheen Rubbing
Stain & Finish. (We sell it for $10.95 a bottle) This is what gives the
grooves of the bead board a darker shade.
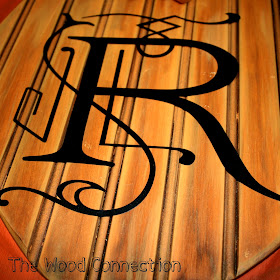
We’ve used Wood Sheen on projects like the pumpkin door hang, sunflowers, watermelons, beehive door hang and many other projects. You can still use a regular stain but you won't get the contrast in colors like you will from the Wood Sheen. As well as the darker colors in the grooves of the bead board. Here you can see the difference.
We’ve used Wood Sheen on projects like the pumpkin door hang, sunflowers, watermelons, beehive door hang and many other projects. You can still use a regular stain but you won't get the contrast in colors like you will from the Wood Sheen. As well as the darker colors in the grooves of the bead board. Here you can see the difference.
For all Wood Connection projects we start by painting the bead board. After your paint is dry, add the Wood Sheen Stain over the paint and brush it over the entire surface. Once it's covered, wipe off the stain with a rag and let dry. When you're done you'll have a nice mix of colors on your bead board. This is from my pumpkin door hang using this technique.
You can also experiment by staining your bead board first and letting it dry approximately 1 hour. (Stain dries much faster on bead board than it does on pine. When staining pine, it take 24 hours for fully dry.) After your stain is dry you can add paint and sand to distress. Here is a photo of what this technique will look like.
Do you have a
tutorial that you'd like to see for my next post?
Email me at woodconnection@live.com with "Attention Rachel" in the subject.
Email me at woodconnection@live.com with "Attention Rachel" in the subject.


I LOVE this tutorial! I was looking at this stuff yesterday wondering exactly what it was. Is it totally liquid, or a gel type or what? I'll have to play with this stuff!
ReplyDelete